This post may contain affiliate links. As an Amazon Associate I earn from qualifying purchases, but there is no additional cost for you. Please see my Disclosure page for more information.
Last week I shared how we lightened and brightened the interior of our RV for less than $200. We love the results and I’m currently hunting for the perfect fabric to make curtains to cover the ugly (but necessary) blinds. While I was painting and wallpapering, I spent some time doing a few other projects in the RV. These easy RV updates and storage solutions are specific to the issues in our RV, but can be tweaked to meet your needs.
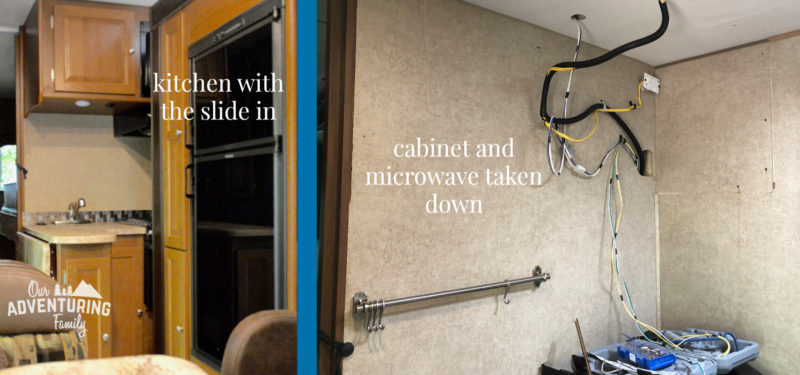
Like the painting and wallpapering, these were inexpensive projects that look good and are useful. If you remember, we have some water damage in the ceiling over the kitchen and in the wall next to the stove. We started taking things apart so we could repair the damage, but the way the RV is constructed makes it impossible for us to do it ourselves.
We’ll be paying someone else a lot of money to do the repairs, but while we’re saving up for that, we still want to use our RV and enjoy it. Now, we could have just left the holes and the wires hanging out, but that offended my sensibilities, so I determined to make things look nicer while adding some storage to make up for the large cupboard we are now missing.
Tidying up the water damaged areas
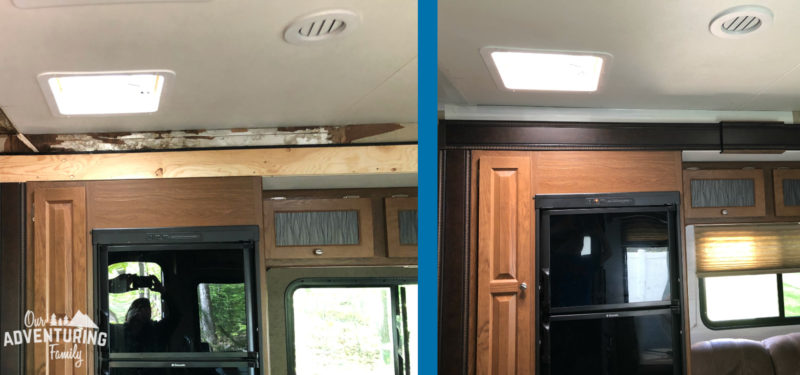
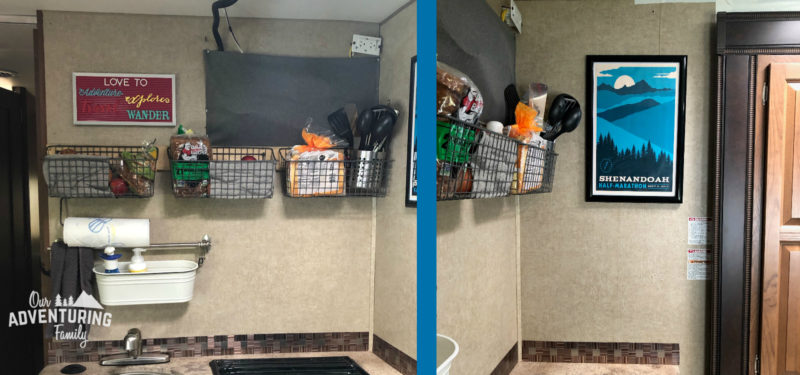
There was a mess of wires for the microwave, stove hood, and a couple of lights just hanging out of the wall. I made sure all the wire ends were capped, then gathered them up as tidily as possible. It still looked ugly, so I went through my fabric stash and found some gray fabric that I stapled over the worst of the mess (keep scrolling for more pictures of the kitchen).
I also used white Flex Tape to cover the gaping hole in the ceiling. We had used some to fix the hole on the outside and had some leftover. When we thought we could fix the damage ourselves, we cut into the wallboard of the ceiling, only to find that it’s glued to the styrofoam insulation in the roof. This is not something we are comfortable messing with, hence the expensive repairs we will be paying someone else to do. In the meantime, at least the ceiling looks a bit better and styrofoam bits aren’t filtering down anymore.
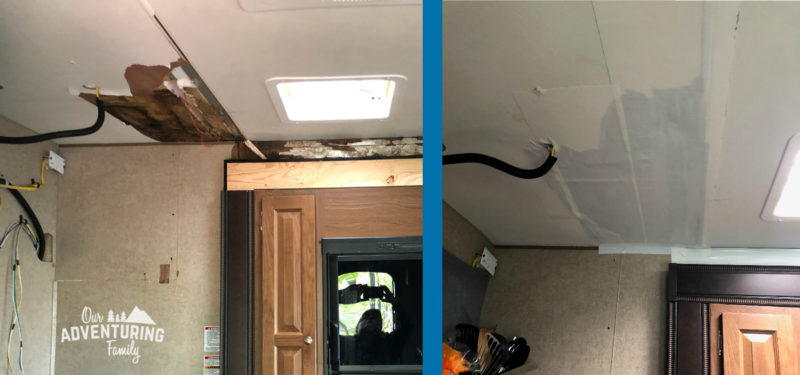
I had also started removing the wallboard over the slide, only to realize that the slide would need to be removed in order to replace the wallboard, which is another thing we do not have the capability of doing. In addition, the wallboard is glued to the metal frame over the slide, and very difficult to remove. That was looking ugly, so I covered it up with white duck tape. White duck tape is cheaper than Flex Tape and will be much easier to remove than the super sticky Flex Tape when the time comes.
The results still aren’t super attractive, but it looks so much better than it used to, so it’s a good stop-gap measure while we save up for the repairs.
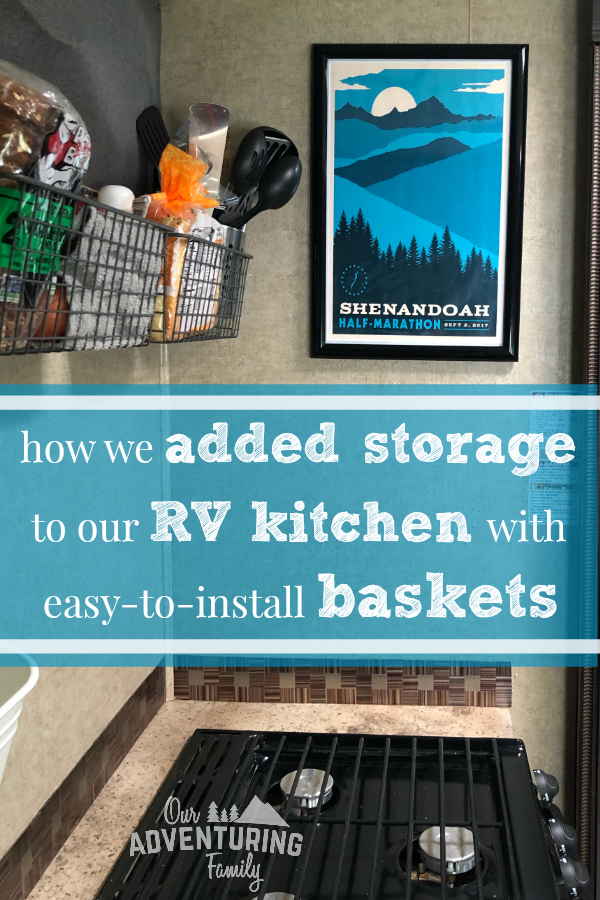
Adding organization
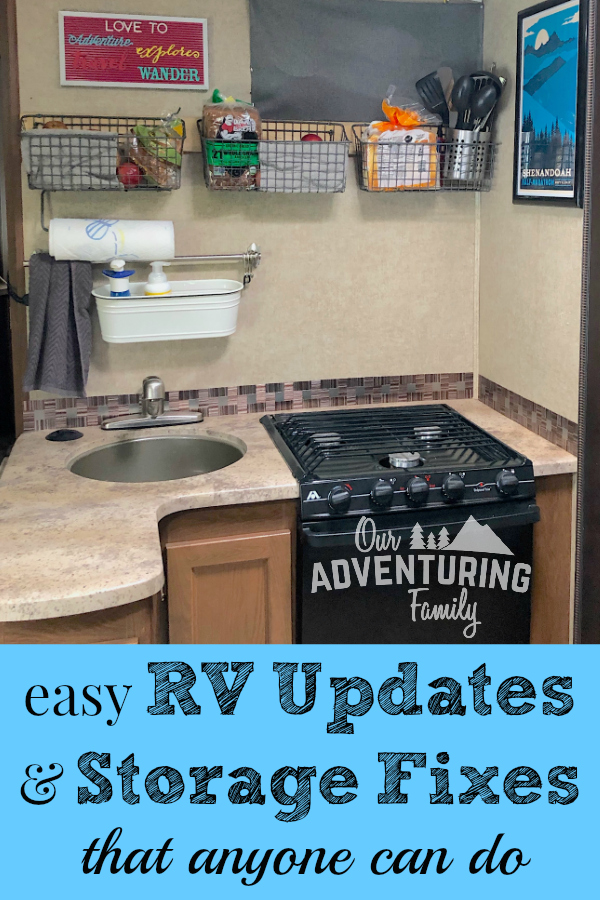
I hung some baskets (two of these and this one with the paper towel holder) above the sink and stove to take the place of the cabinet we removed. I wanted the baskets to be secure, so I screwed a 1×3 board to the studs in the wall, then screwed the baskets into the 1×3. (we hung the white IKEA hanging basket some time ago, after we bought the RV)
While I don’t love the way the paper towel holder rests on the bar for the IKEA basket, I couldn’t adjust the spacing any more and it would be a fire hazard to put the paper towels closer to the stove. Then I hung a lightweight picture frame and a small message board on the walls to cover some of the ugliness there.
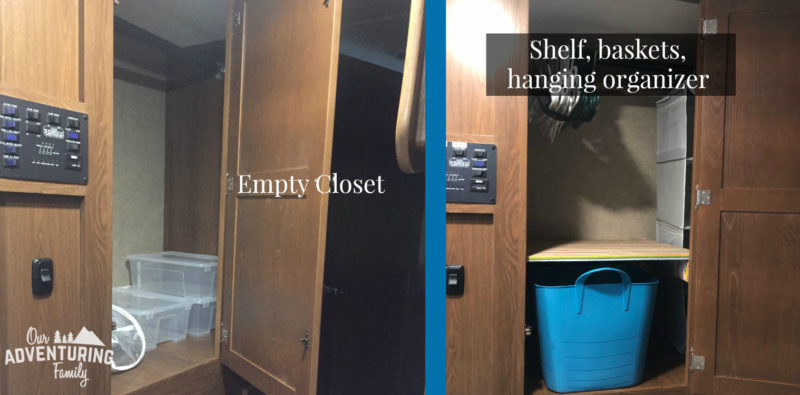
I also added a shelf to the large closet in the hallway. I put two baskets under the shelf, and now this formerly large open space is being used much more efficiently. In the past, we stacked bins on the bottom of the closet, but invariably we’d have to pull them all out to find the one we were looking for. Ditching the bins for the hanging organizer and the shelf makes it much easier to find what we’re looking for.
One more fix
While I was doing all this work, I also took the time to beef up the back of the dinette. There had been just a thin piece of pleather-covered plywood holding the cushion in place. It was very thin plywood and it cracked the first time someone leaned on it our first or second trip out in the RV. The plywood has suffered more cracks in the years since, and it was time to replace it.
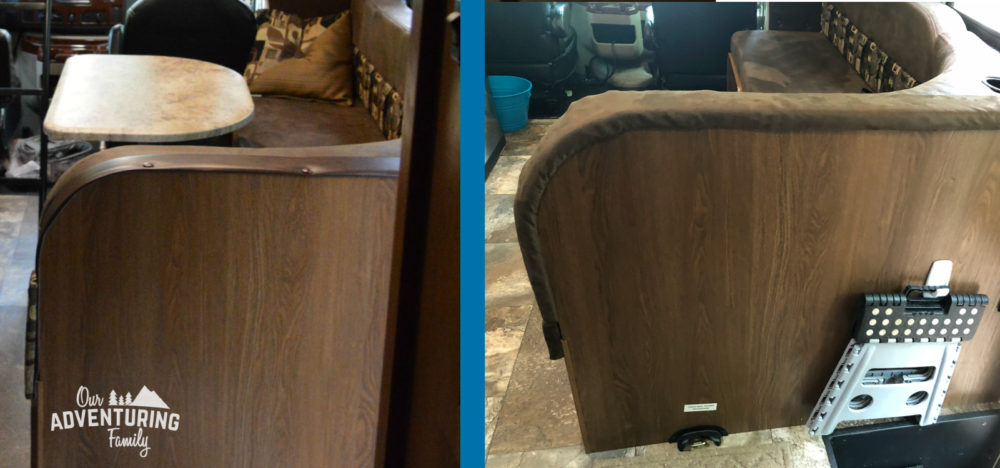
I used 1x4s for the top and side pieces and cut another piece of 1×4 into small pieces (1.5 inches wide) to fit the curve. I screwed some metal pipe strapping to the backside of the pieces of wood to keep them in place.
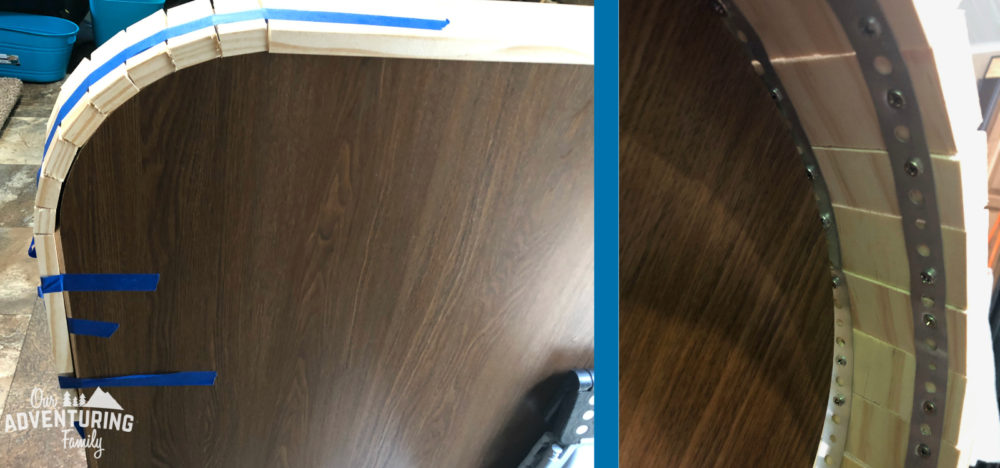
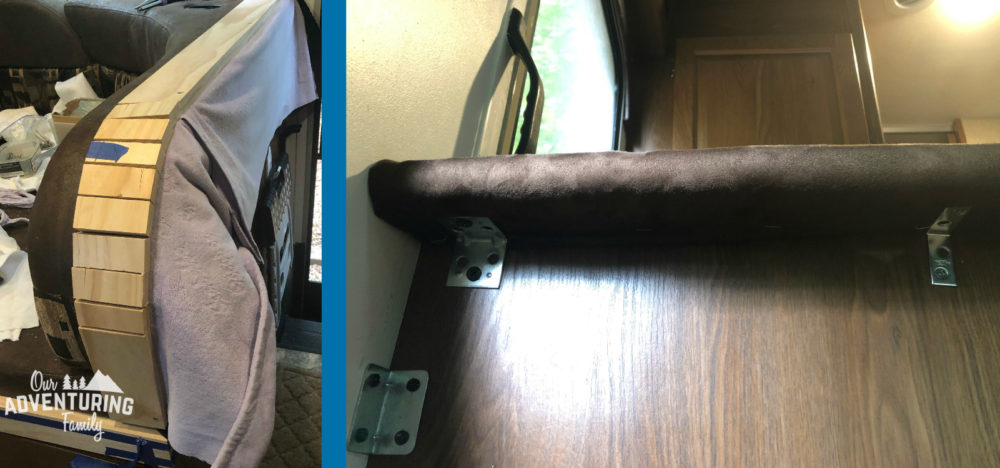
Then I started working on covering the wood. I bought some dark brown microfiber fabric that matches the dinette cushions remarkably well. I thought I had some quilt batting, but I didn’t, and I didn’t want to run to the store again, so I layered some fabric I had sitting around. Some velour, some felt, and some terrycloth under the microfiber. That many layers was overkill, but I wanted a good amount of padding, and they did the job.
I stapled the layers of fabric to the back of the wood on one side. Then I put the wood in position and screwed it to the frame of the dinette. After that, I was able to pull the fabric into place and staple it to the underside of the wood. Once I secured the fabric to the wood, I added some corner braces to the underside to keep the wood pieces in place and add stability and strength.
The curve was a bit trickier than I anticipated. The fabric lay flat when the wood was stretched flat, but as soon as I curved the wood pieces, the fabric twisted. It wouldn’t have been an issue, except I had only bought enough fabric for the project and there wasn’t enough to completely compensate for the grain of the fabric. Since I wasn’t willing to make another trip to the store, I squashed my perfectionist tendancies and made it work.
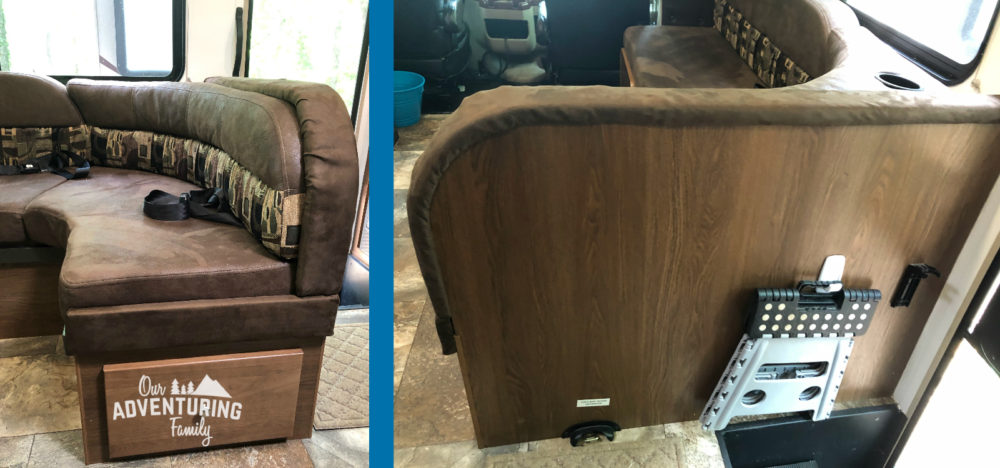
While the end result isn’t perfect, it looks fine. The fabric blends well with the existing upholstery. Even better, we’re no longer afraid to hang onto the top of the dinette as we go up and down the stairs. It is so much more sturdy than the original, and I’m pleased with how well it turned out.
If you’d like more detailed instructions on any of the projects I shared today, leave a comment letting me know.
Have you added updated your RV or added storage or organization systems to suit your needs better? I’d love to see some pictures!