This post may contain affiliate links. As an Amazon Associate I earn from qualifying purchases, but there is no additional cost for you. Please see my Disclosure page for more information.
Have you thought about brightening the interior of your drab brown and tan RV or trailer? We’re planning on selling our RV in the next year or so, so we weren’t originally planning on putting the time and effort into updating the bland interior. However, after finding water damage, those plans changed.
The water damage will be expensive to fix, but we didn’t find that out until after we had removed the cupboard and microwave over the stove. Since the side wall is the one that’s compromised, we’re not putting that heavy microwave back up until it’s fixed.
So we were left with two ugly walls in the kitchen area and an even uglier ceiling. There’s not a lot that can be done about those right now (though I was able to do a little, and I’ll share what I did in my next post), so I decided to brighten up what I could.
The demo
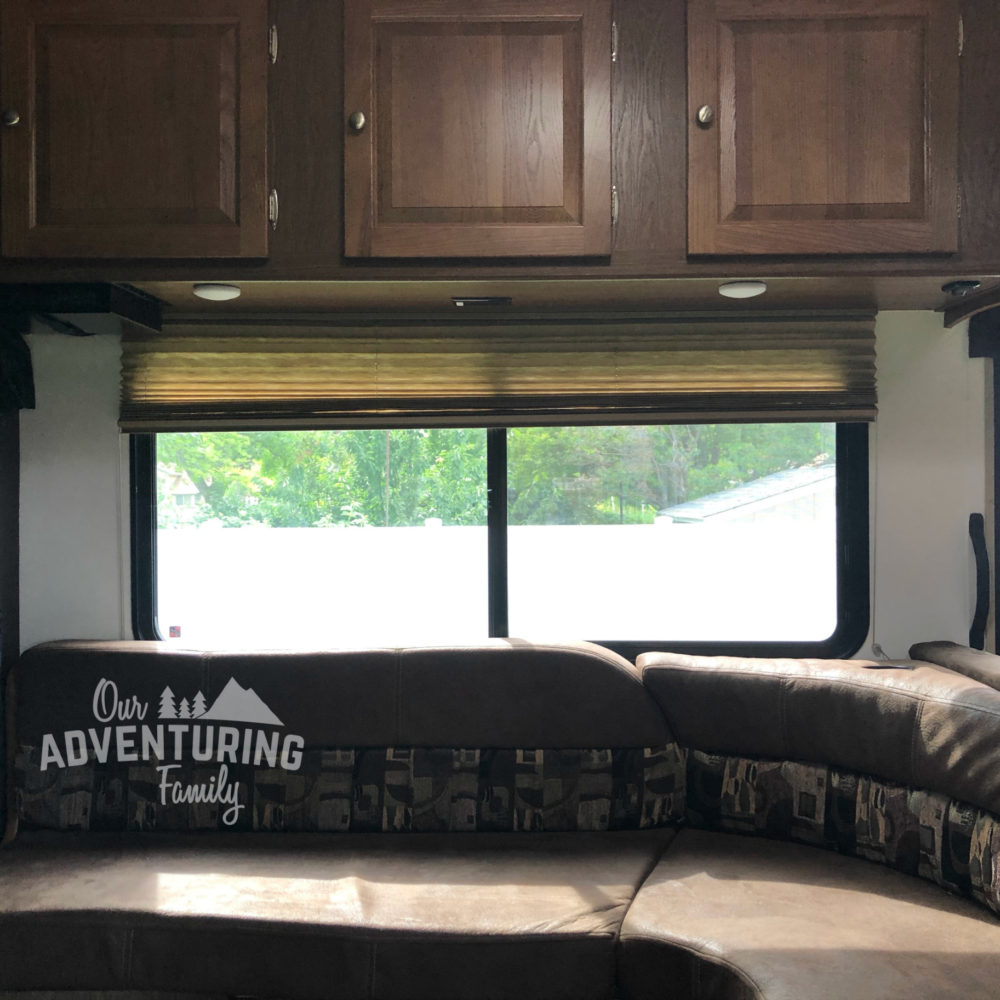
I had already removed all the window coverings when we were getting ready to cut into the damaged walls because those were just too ugly to stay. That alone made such a difference in how bright the RV was.
Next up was clearing the slides and over-cab area. Jeremy and I removed the jackknife sofa, which had to be taken apart before we could get it out the narrow RV door. Then we hauled out our mattress and the kids’ mattress from the over-cab bed.
I also removed all the dinette cushions and anything else that might get in the way while I was working.
The work I did
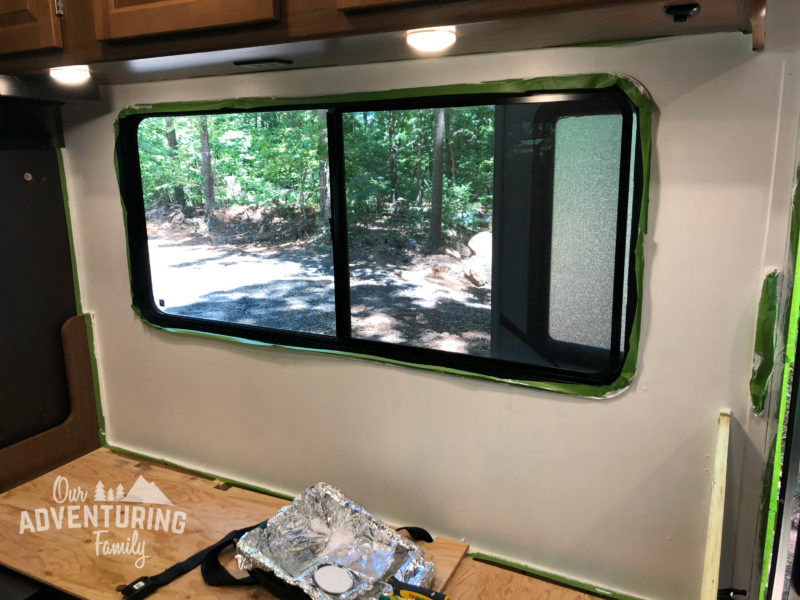
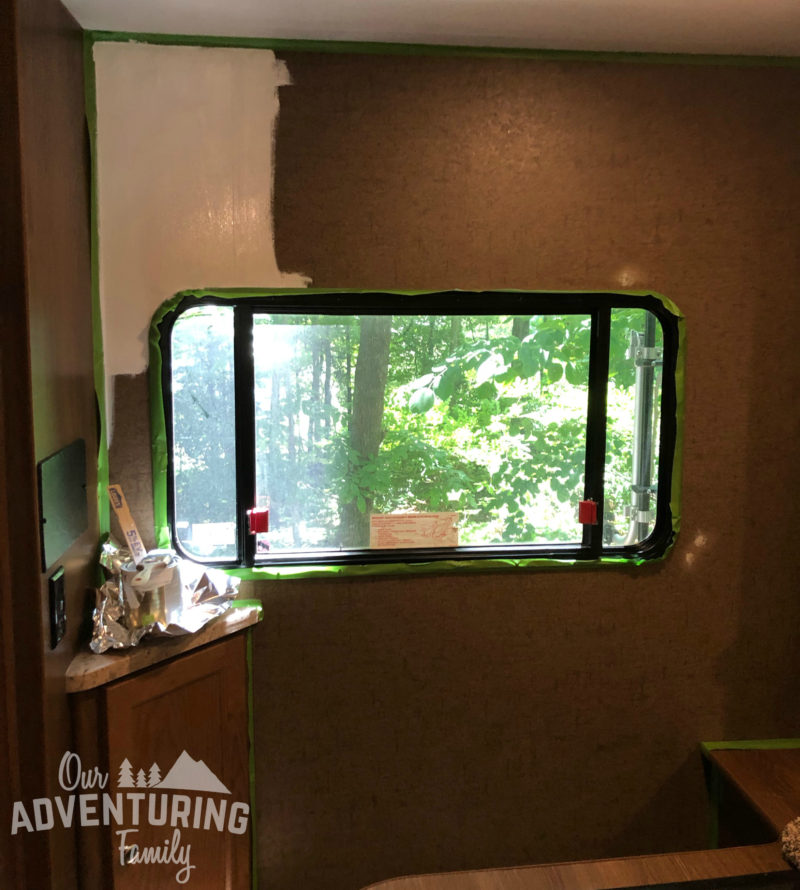
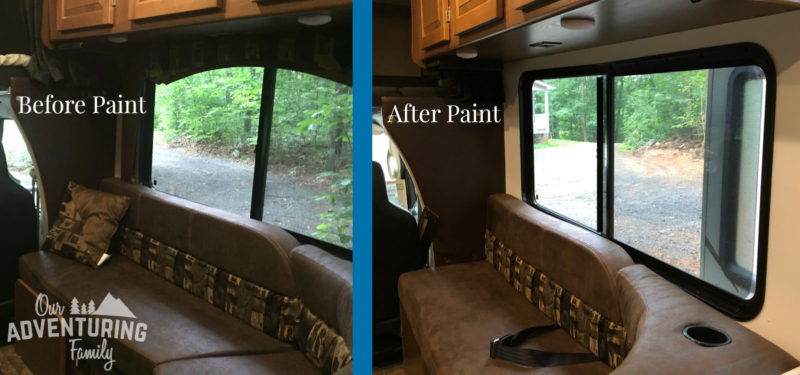
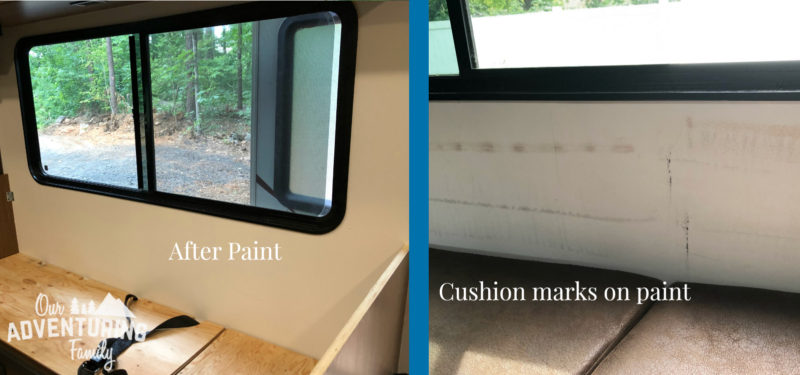
I filled and sanded the holes from the window covering screws, then washed down the walls I’d be working on with rubbing alcohol. Next, I taped off the passenger side wall next to the dinette, then painted the first coat. I used a paintbrush for the first coat to make sure I got in everywhere.
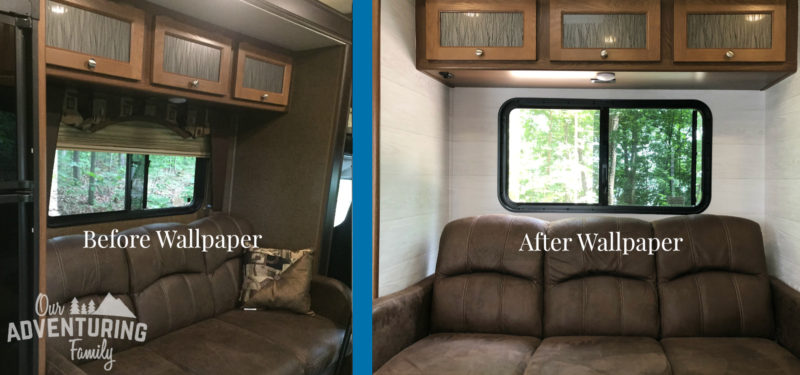
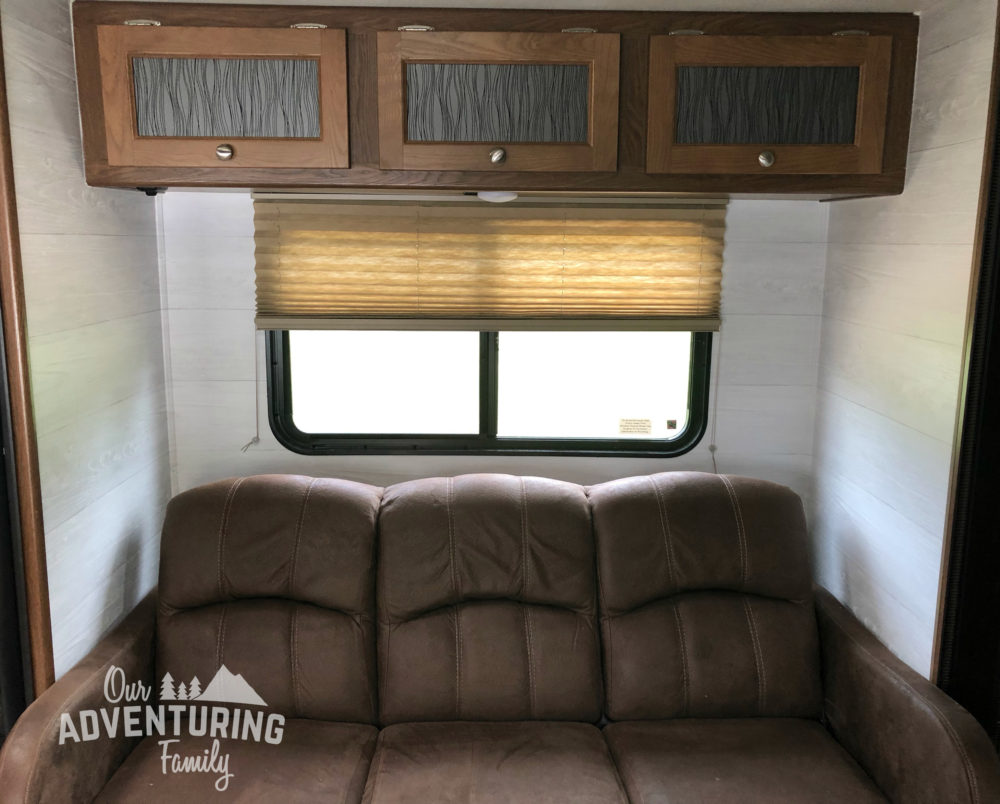
While that was drying, I started on the peel and stick wallpaper behind the sofa. I used a wallpaper smoothing tool to smooth all the wrinkles out as I carefully lined up everything. The wallpaper went up easier than I thought and with fewer bubbles than I thought there’d be. However, it did take time to make sure I matched up the seems and patterns correctly. I was able to reposition the wallpaper to get the alignment correct and it didn’t lose its adhesive properties.

The wallpaper is a light gray and white shiplap look, which I really like. It also has a slight texture to it when you rub your hand over it. There are darker patterns available, as well as patterns with more color, but I wanted to lighten things up. I didn’t want anything too dark or too visually distracting, and this wallpaper fit the bill (scroll down for more on what I used and where I bought it).
Next, I painted the second coat of paint on the dinette wall. I used a paint roller for the second and third coats except for the tiny spaces it couldn’t fit into, where I used the brush.
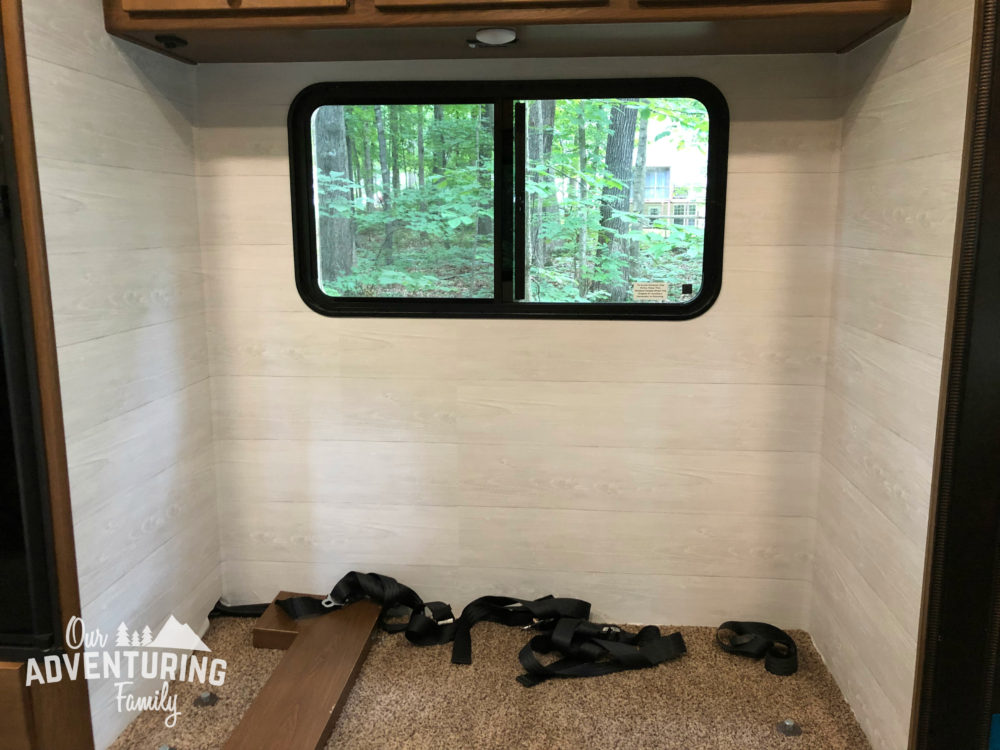
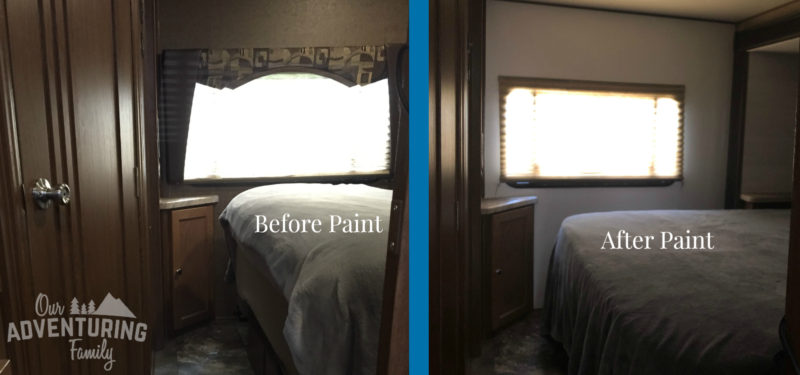
While the second coat of paint was drying, I started working in the bedroom. I taped and painted the rear wall, following the same steps I used for the dinette wall.
While that paint was drying, I removed the ugly headboard from the wall. Then I installed wallpaper on all three sides of the slide.

I then rotated back to the dinette and painted the third coat of paint on the dinette wall followed by the second coat of paint on the rear wall. I pulled the painter’s tape off the dinette wall before the paint finished drying.
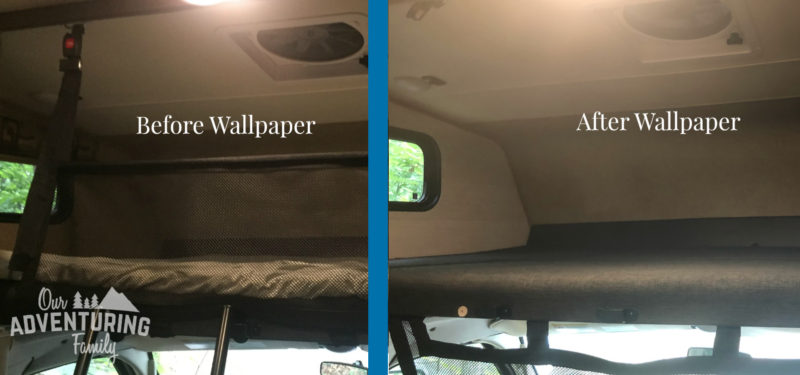
Next, I wallpapered the side walls of the over-cab bed. I wasn’t sure if I would have enough wallpaper for those walls, but with a bit of creative pattern matching, I made it work.
Then I painted the third coat of paint on the rear wall and pulled off the painter’s tape while the paint was wet.
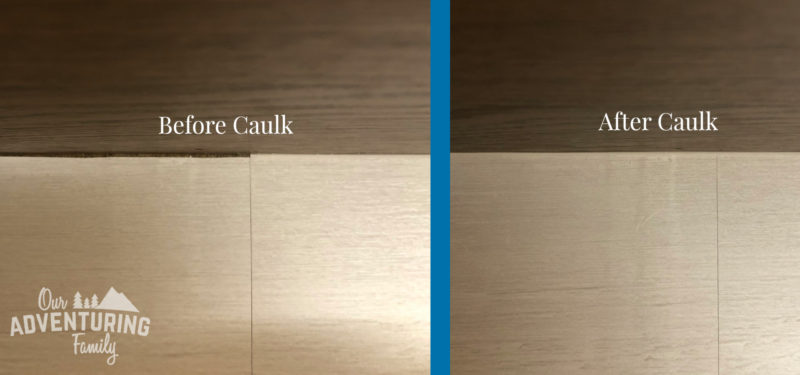
Last, I caulked the edges on the painted walls and the edges where the wallpaper met the cupboards. Caulk hides any uneven spots and gives a smoother, more cohesive finish. I’m also hoping that the caulk might keep the wallpaper in place should it try to peel off, though we’ll have to wait and see on that one.
Putting it back together
After I finished painting, wallpapering and caulking, it was time to move on. I put the blinds back up but left the ugly valances off. They obscured almost 1/3 of the window, and therefore 1/3 of the light coming in.
The blinds had been attached to the valances so I had to drill holes for the screws into the metal frame. This was a bit nerve-wracking and I went super slow so that I wouldn’t punch through to the outer wall. Thankfully, I only had to do that for the over cab window and the rear window. The dinette and sofa slide windows have cupboards over them, so I screwed the blinds into the underside of the cupboards.
Because I raised the blinds a smidge, they no longer block part of the window when they’re pushed all the way up. This was not the case before, and I am loving how much more light comes in now.
I thought about putting up curtains but haven’t done it yet because I didn’t have time before our road trip. While the color of the blinds is a bit ugly, they are functional. I do plan on putting up some curtains when I find some cute fabric.

Why we didn’t paint the cabinets or install a backsplash
I thought long and hard about painting the cabinets. I love the look of white cabinets, and our trailer had white cabinets. But I don’t want to worry about all that paint chipping off the cabinets right when we’re trying to sell the RV. And it would be A LOT of work to prep and paint all the cupboards. I just don’t have that kind of time right now.
I do have plans for the kitchen walls, but I can’t move forward with them until we get the wall and ceiling fixed. Well, I could, but I’d just have to re-do it, so that would be a waste of time and money. Once we get the wall and ceiling fixed I plan on putting up adhesive tiles (probably these ones) in the backsplash area around the sink and stove. So many people are doing this, and it looks so good!
How much we spent to paint and wallpaper
- $30 1 qt of paint (bright white Valspar paint and primer in one)
- $6 1 roll of Frog Tape
- $120 4 rolls of self-stick wallpaper from Lowes (cheaper on Amazon, but I was on a time crunch)
- $5 1 wallpaper toolkit from Lowes
Total: $161
We had everything else on hand: paintbrush, paint roller, paint tray, and caulk. Even if you had to purchase those items, you’d still come in under $200.
Final thoughts
I love how it turned out! Even though we left the cupboards brown, it is so much brighter! However, I have noticed that the dinette cushion zipper seams are leaving brown marks on the wall below the window. Since the cushions usually cover this area, it’s not a big deal, but it’s something to think about if you use the dinette as a bed (we don’t).
Because most of the areas I worked on were small, nothing took very long to do. The exception would be the wallpaper in the sofa slide since that has the largest surface area. That’s not to say these projects didn’t take time, because they did, but it was manageable chunks of time.
Are you feeling inspired? Have you already done some updates to your RV or trailer? I’d love to see some pictures!

Wow, that looks SO nice! Must be so satisfying when you’re on a trip to enjoy the new, improved look.